Sunday, March 24, 2019

Story | Sunday Sketch at Citrus Twist Kits

Hey friends!  I'm excited to be on the Citrus Twist Kits blog today sharing this week's Sunday Sketch.  Sketches are so fun to work with, and CTK always has the best ones!   I hope you will play along!

Here's the sketch for this week:


 I love this design!  When I first saw it, I knew it would work perfectly as a layout in my Life Crafted Album.  Here's the spread I created:


For my layout today, I am using the Life Chapters Kit and the This is Life "Bookends" Stamp.

I loved the sketch so much, I decided to follow it fairly closely.  One of the only changes I made was mirroring the sketch.  

To begin the layout, I used my Silhouette Cameo to cut out one of the free subscriber cut files to use as my background.  I loved this detail from the sketch and wanted to use it on my spread.  I used a patterned graph paper from the kit and then layered it over a striped paper, also from the kit.

Next, I used some of the ephemera, word stickers and chipboard pieces to embellish this side of the layout.  I also did some stamping using the This is Life "Bookends" Stamp.  I love the extra interest stamping adds to a page!


Next, I used a journaling card from the kit, the stamp set, and some of the cut aparts to embellish the pocket, and I trimmed one card into a tag shape for my journaling.  The scalloped pocket from this month's kit was perfect for holding the tag with my journaling.  


For the right side of the spread, I trimmed a couple of the kit papers into narrow strips and adhered them to the edge of the page.  I used more ephemera, cut aparts, chipboard pieces, and stamps to embellish this area.


To finish off the layout, I added some machine stitching.  I love the texture and interest this adds to a project.

Here's one final look at my layout using this week's sketch:


I can't wait to see your take on the Sunday Sketch!  I hope you will play along and post your layout on the CTK Fan Page on Facebook!

xo,
Marsha

Saturday, March 23, 2019

Happiness

Hey friends!  I'm back today sharing a traveler's notebook layout using the Hexagon Heart cut file from The Cut Shoppe.


Heart cut files are my favorite ones to use on layouts.  When I saw this geometric heart, I couldn't resist using it in a big way on my spread.

For this layout, I used mainly the Pinkfresh Studio Joyful Day collection.  I began the page by using my Silhouette Cameo to cut out the file using white cardstock.  I backed the cut file with some pink striped patterned paper from my stash.

Next, I layered some patterned paper behind my photo, and added some ephemera pieces and puffy stickers around the photo.  I also fussy cut a few elements from the patterned papers in this collection and added them to the page.  A large "happiness" puffy sticker serves as my title.


I added a small embellishment cluster at the top of the other page, using more ephemera pieces and puffy stickers.  How cute is that little pinwheel?!?  I wish there had been more of those in the pack!

At this point, I felt like the page was missing something, so I tore the background paper in two spots and added some patterned paper behind the torn areas.  To finish off the spread, I splattered some white acrylic paint.


Thank you for stopping by today!  I hope you will try using a large cut file on your next project!

xo,
Marsha

Wednesday, March 13, 2019

Chapters

Hey friends!  I'm so excited to be here today sharing my first post as part of the Citrus Twist Creative Team!  This was the first kit club I ever subscribed to, and I can't believe I am a part of the team!


The March kit, Life Chapters, is absolutely gorgeous, and I created a layout using the kit, cut aparts, and Traveler's Notebook Stamp Set.


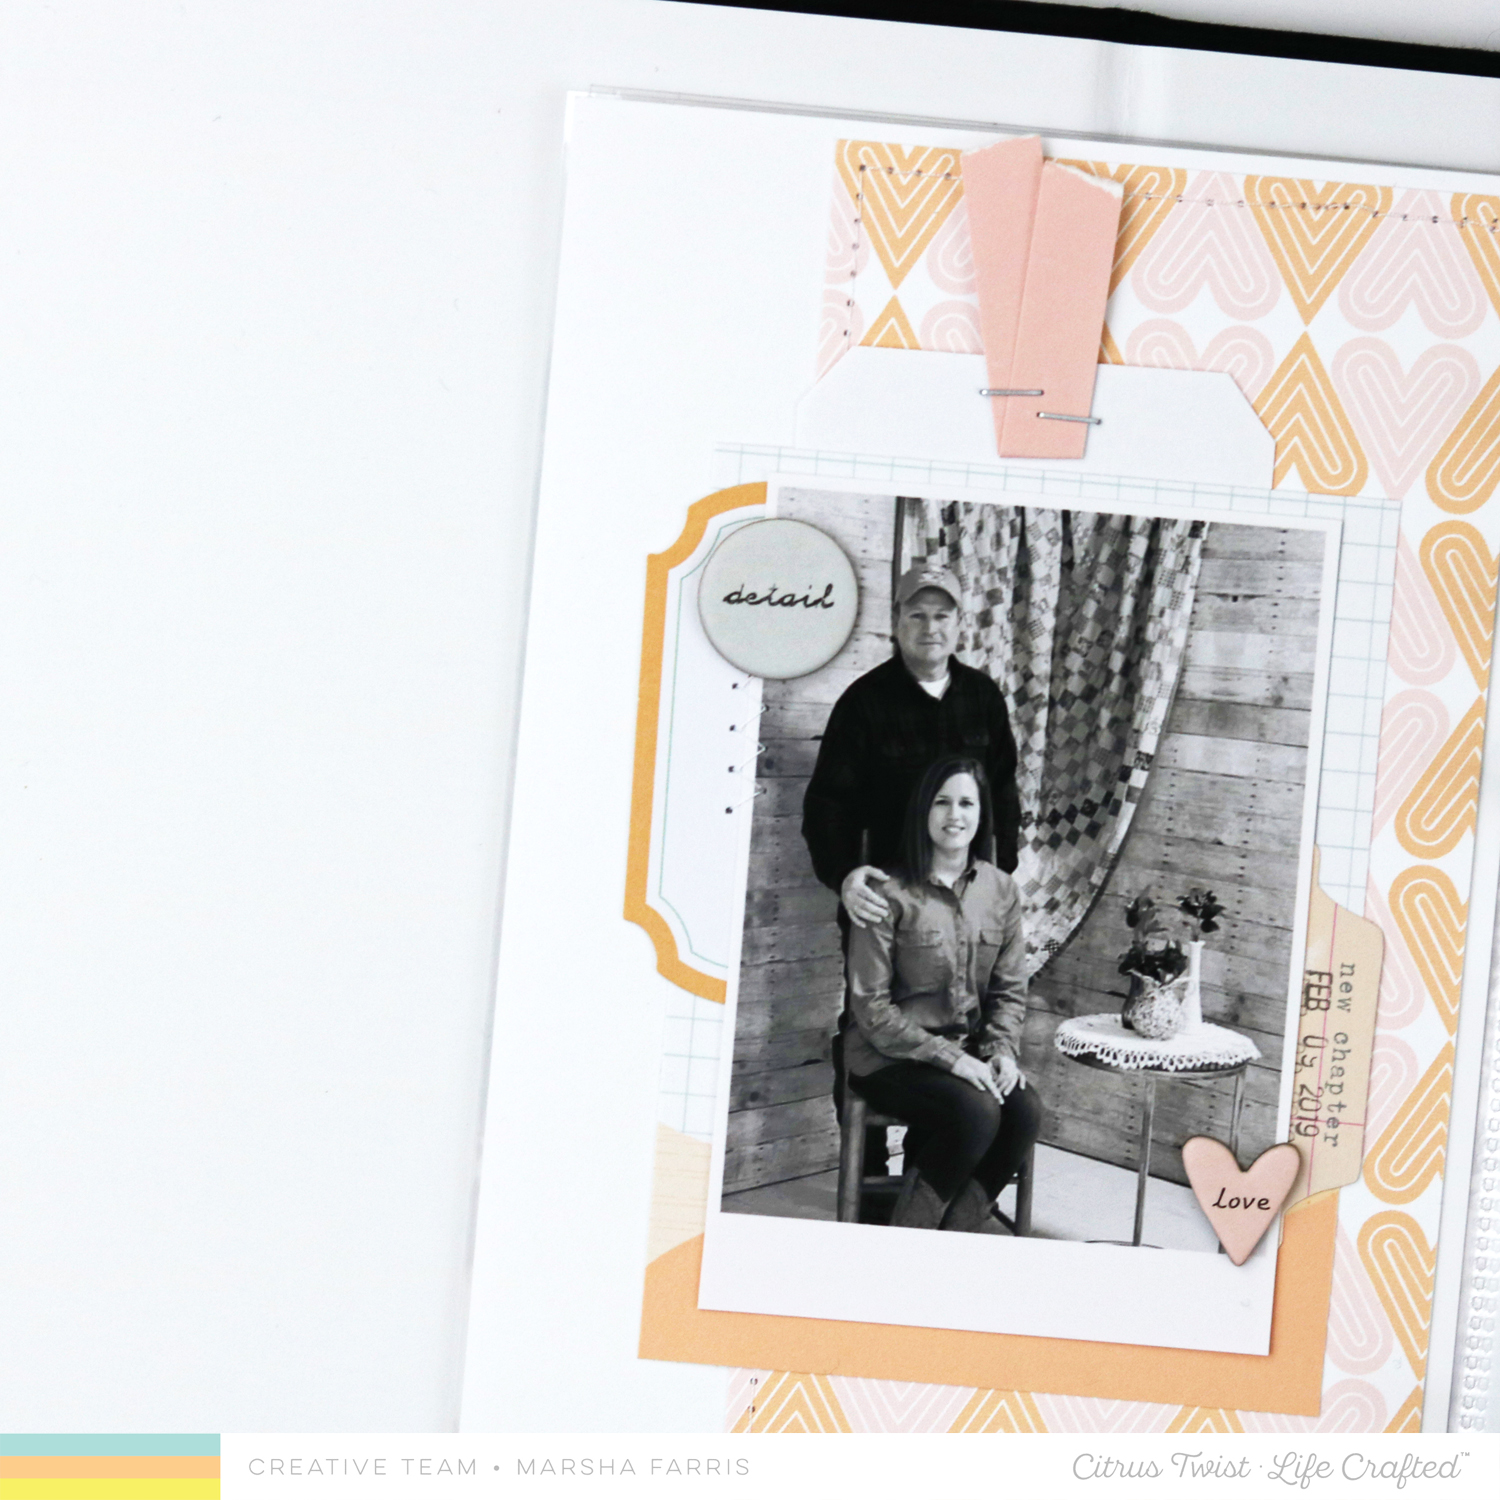
To begin the layout, I chose a black and white photo of my husband and me, taken last month at a Valentine's Day Banquet.  The geometric heart patterned paper from the kit is my favorite, so I decided to use the full sheet on my layout.  I cut it in half and layered it over some white card stock, machine stitching around the edges for interest and texture.

I layered the "chapters" ephemera piece along the edge of the patterned paper to serve as my title.  Next, I stamped on a label using the Traveler's Notebook Stamp Set.  The sentiments on this set are perfect for my layout!    I used some of the cut aparts, and one of the chipboard circle pieces to complete this section of the page.


For the other side of the spread, I used one of the journaling cards from the kit as a mat for my photo.  I layered a label behind the photo, stamped the date on a tab, and added a couple of chipboard pieces.  I trimmed another one of the 3x4 cards into a tag shape to use for my journaling and tucked it behind the photo.


Here's another look at my completed layout.


Thank you so much for stopping by today!  I hope you will check out my post on the Citrus Twist Kits Blog today!

xo, Marsha

Monday, February 25, 2019

Beautiful

Hey friends!  I'm here today sharing a layout in my traveler's notebook album.  For my spread, I used the new Beautiful You cut file from The Cut Shoppe.


I used mainly the gorgeous Cocoa Vanilla Studio Midnight collection to complete this layout.  To begin, I cut out the cut file using a wood grain paper from this collection.  I chose to back it with an ombre patterned paper.  I just love the way it looks layered behind the wood grain!  Next, I chose a few die cuts and stickers from this collection to create a small embellishment cluster at the bottom of the page.


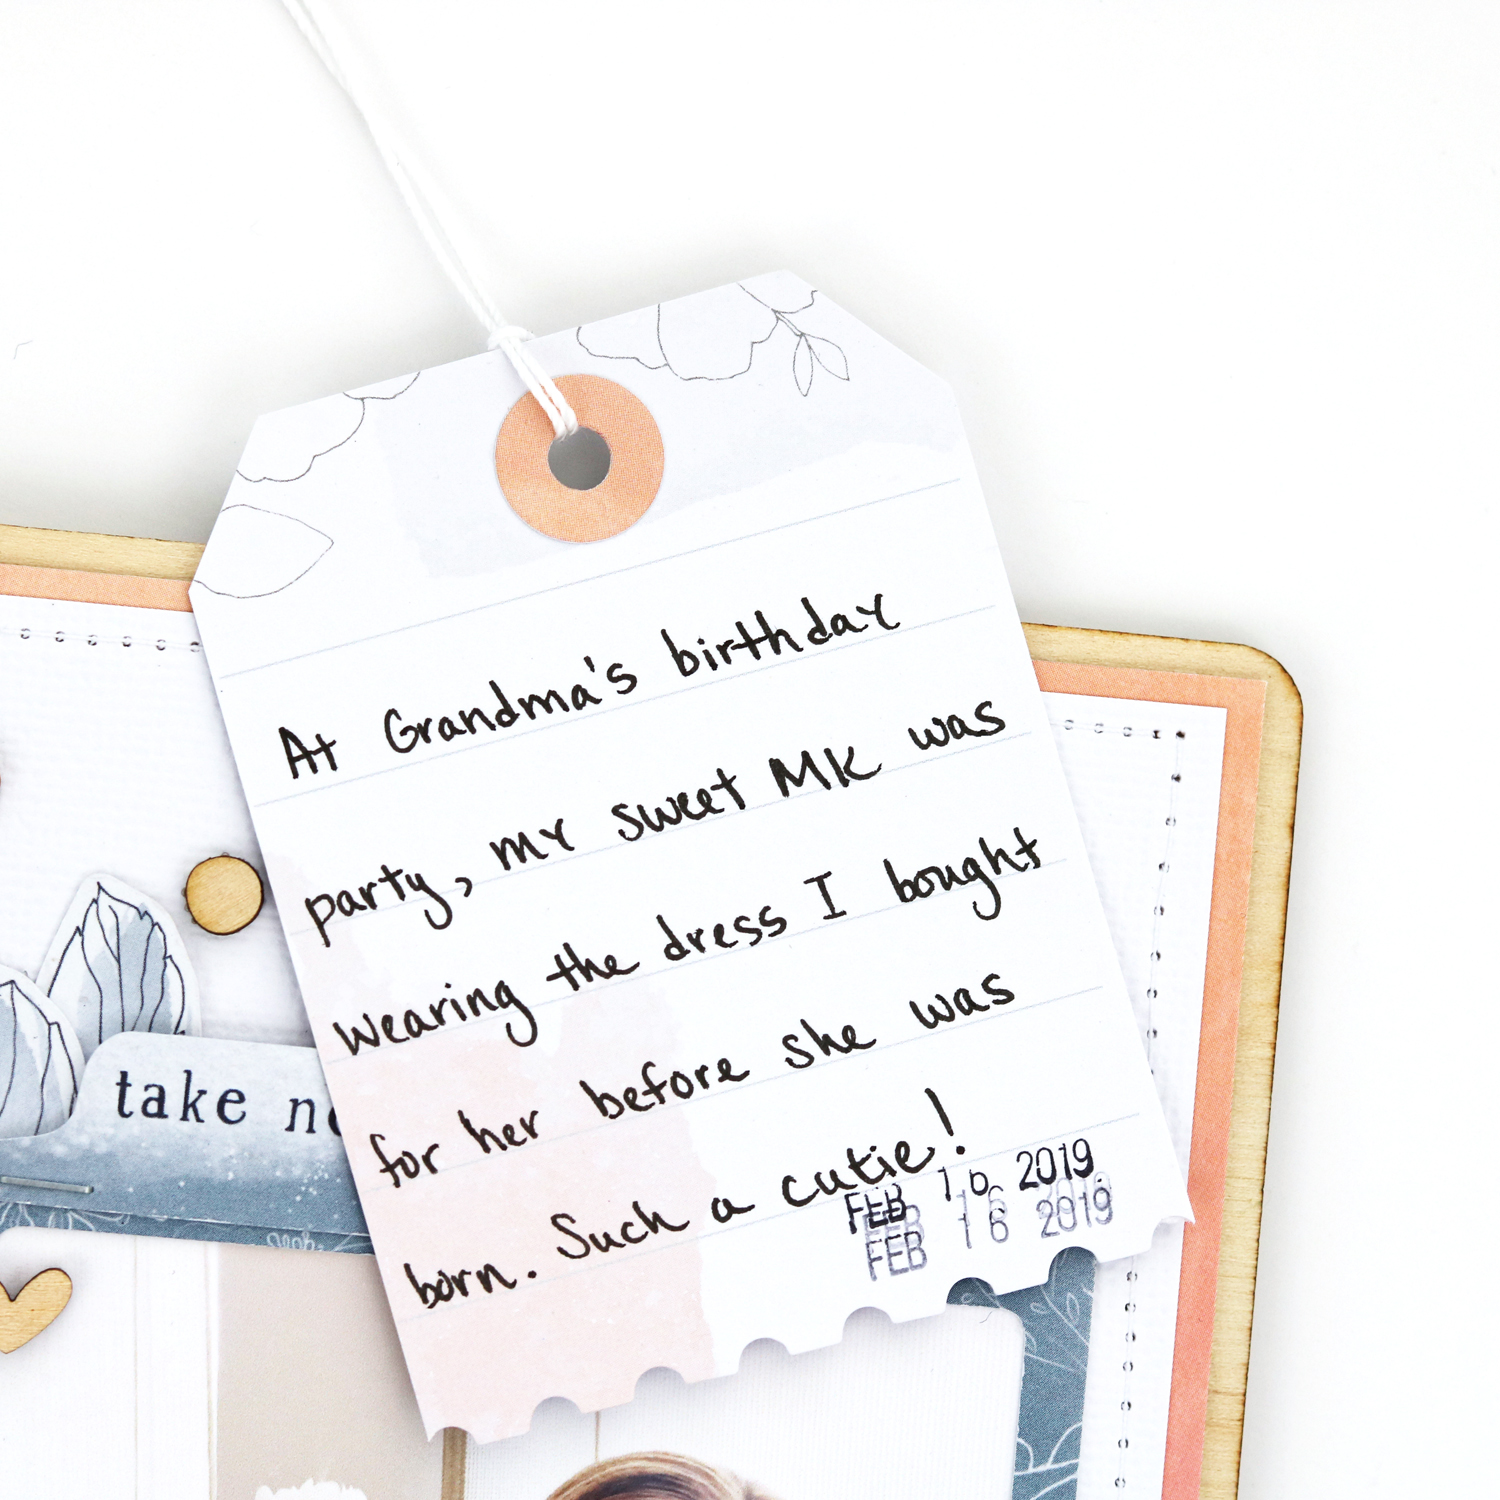
For the other page, I layered my photo behind a photo frame die cut and placed a few other ephemera pieces at the bottom and top of the photo.  This helps to lead the eye around the page and draws attention to the photo of me with my niece.  She's such a cutie!


I hand wrote my journaling on a tag and tucked it behind the photo.  For the final finishing touches, I did some machine stitching on the edges of both pages and sprinkled some wood veneer dot and heart pieces around the page.


Thanks for stopping by today.  I hope to see you again soon!

xo,
Marsha

Friday, February 8, 2019

Happy | Traveler's Notebook Layout

Hello friends! I'm back with you again today sharing a layout in my traveler's notebook. I used the Nothin' But Love Traveler's Notebook Decorative Page cut file that just released at The Cut Shoppe.
The Traveler's Notebook Decorative Page cut files make creating in a traveler's notebook so quick and easy, because they are sized to fit perfectly on a TN page.

To create this layout, I used mainly the Cocoa Vanilla Studio Midnight collection I received in my February kit from Clique Kits. I chose to cut out the cut file using white cardstock so the cut file would stand out from the pink ombre paper. I absolutely adore the hearts on this cut file!

I layered some diecuts from the ephemera pack at the top and bottom of the page to add interest to these areas. I also added some stamping and machine stitching.

For the other side of the layout, I used another patterned paper from the Midnight collection as the background. Next, I added my photo and layered a frame and more ephemera pieces. I did some journaling on a label, and added some stamping and machine stitching to finish off the spread.
Thank you for stopping by today! 

Wednesday, February 6, 2019

You Hold My Heart | Traveler's Notebook Layout

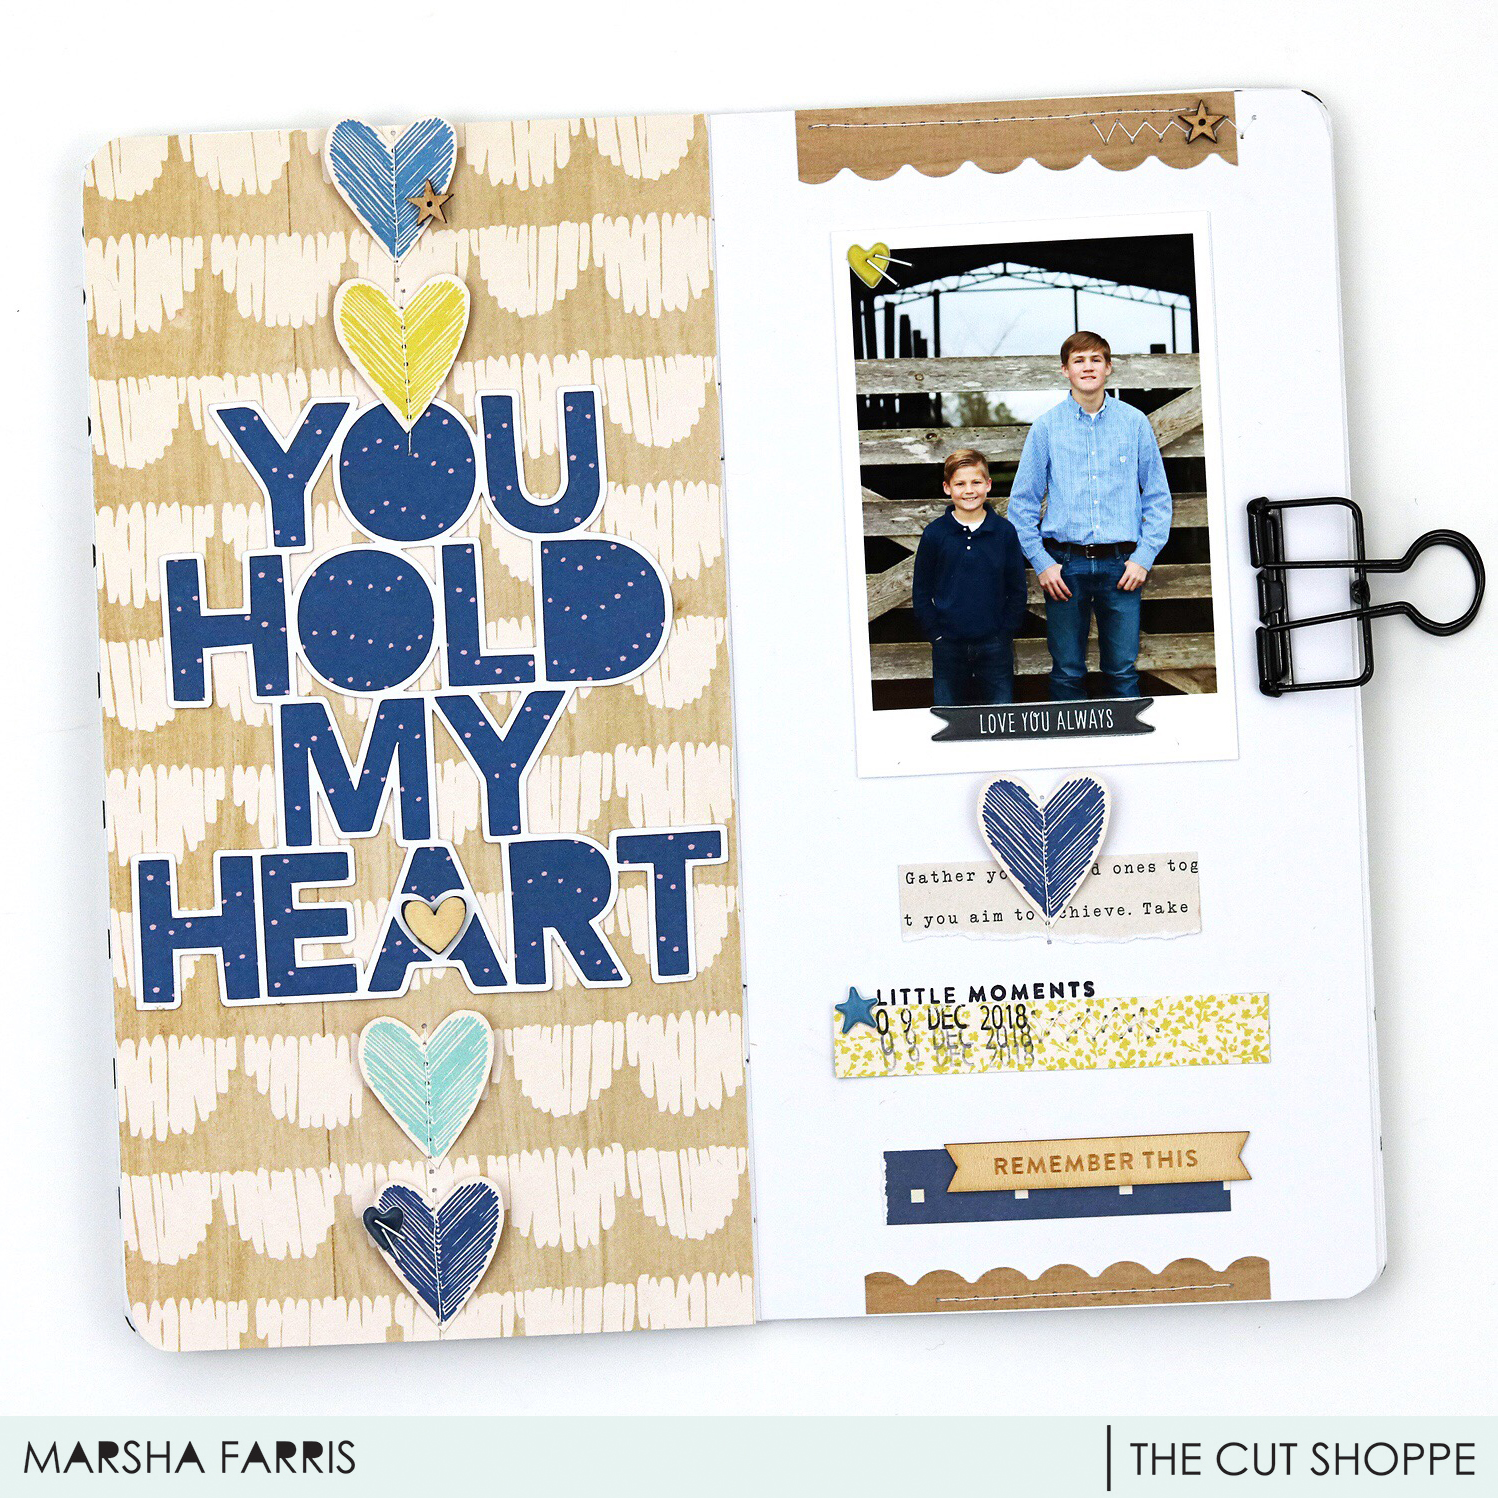
Hey friends! I'm excited to be here today sharing my current FAVORITE layout in my traveler's notebook.  I used the Hold My Heart cut file that is available at The Cut Shoppe.
I love this photo of my sons taken last year on our farm, and thought it would work perfectly with the cut file.

For this layout, I used mainly the Maggie Holmes Willow Lane collection.  I cut out the cut file using white cardstock and backed it with a navy patterned paper. I chose a wood grain scallop paper from this collection to use as the background for the page. This is my favorite paper from the collection, so I was excited to get to use it on a layout!  I fussy cut some hearts from another paper and used my sewing machine to stitch them to the page, folding them down the center for added dimension.  I love how this turned out!

For the other page, I adhered my photo and added several strips of paper from the same collection. I did some additional machine stitching and added some stamping. To embellish the page, I added a few puffy stickers, staples and wood veneer pieces.
Thank you for stopping by today to take a look at my latest creation!  Happy crafting!

xo, Marsha

Monday, January 7, 2019

The Ton's 4th Anniversary Blog Hop - Day 3

Hello & welcome! I am excited to be a part of The Ton's 4th Anniversary Blog Hop Day 3! You should have arrived here from Tazhiana Gordon's blog.

The Ton is celebrating 4 years this month and Effie has introduced 9 new designs for this release. There are some free gifts with purchase promotions ongoing. Head over to The Ton Stamps' blog for more details. The Ton Stamps is also doing some giveaways! For more details, be sure to read to the bottom of this post.


I love Effie's designs and decided to make a traveler's notebook layout using the new Hustle and Grind Sentiments Set. The brush font on this set is awesome, and the empowering sentiments worked perfectly with the layout I chose to create documenting my 2019 goals.


To create this layout, I began by stamping a variety of triangle shapes from the stamp set to create my own patterned paper. This is one of my favorite ways to use stamps. I used The Ton Stamps Mini Ink Cubes in a variety of colors, including the Ruby Red, Orchid, and Amethyst Couture Minis Sets. I also used Ranger Archival Ink in Shadow Gray and Jet Black. I love the added interest this provides on the spread.

I stamped the word "husle" from the stamp set on vellum, trimmed it into a banner shape, and used my Tiny Attacher stapler to adhere it over the photo. I then stamped another sentiment from the set onto a label and added it below the photo. I love all of the sentiments on this stamp set!

For the other page of my layout, I stamped the title using a sentiment stamp from the set and Ranger Archival Ink in Jet Black. I then stamped more of the triangle shapes from the set using the same ink colors I used on the other side of the spread. This helped to make the pages more cohesive. To embellish the spread, I added die cuts, labels, puffy hearts, and enamel dots.


Here is one final look at the completed project.


There is so much you can do with this set, and I look forward to creating with it again soon!

GIVEAWAYS

There are giveaways everyday on these mini hops! Win a stamp of choice from The Ton's new release. To enter, leave a comment on each blog each day. Effie will choose one winner per day (4 winners total) and announce the winners on The Ton's blog by January 12. The comment period for these giveaways will close on January 11 at 7pm EST.

BLOG HOP

The Ton (Heba Alsibai)
Tazhiana Gordon
Marsha Farris -- You are here
Kira Ness -- Your next stop
Susan B.
Olga Matyushevskaya
Ilda Dias

Thank you for stopping by today! Happy hopping!

xo, Marsha


Saturday, December 29, 2018

Absolutely Love

Hello again!  It's been a while!  I love sharing all of my crafty projects with you, and I hope to make blogging more of a priority in the new year.

I am up on The Cut Shoppe blog today sharing this fun traveler's notebook layout.  I used the Crazy Love cut file from The Cut Shoppe Etsy store to create this spread.


I used mainly the Citrus Twist December 2018 Main kit to create this layout.  I started by choosing the background paper, a patterned paper with a beautiful mixed media look but none of the work!  It is from the Pinkfresh Studio Indigo Hills 2 collection.  I cut out the cut file using white cardstock and backed it with a navy dot paper.  I just love the bold look of this cut file!

I layered some die cuts and puffy stickers from the American Crafts Journal Studio collection, and added the other portion of my title using Pink Paislee Thickers.
For the other page, I used more of the die cuts to layer behind my photo.  I then used the puffy stickers, die cuts and an arrow paper clip to embellish the page.

Thanks for stopping by today!  I hope you will come back soon to see the new projects I am creating!

Saturday, October 13, 2018

Say Hello to Fall


Hello!   Today I am sharing a project I created for The Cut Shoppe- a layout in my traveler's notebook album using the new Falling for You Traveler's Notebook Decorative Page cut file that can be found at The Cut Shoppe.


I love fall layouts and recording all the fun things we do during this season.  I thought this cut file would be perfect for my TN spread documenting a photo of my son taken last year at our local fair. 


I started by cutting out the file using white cardstock.  I chose to use a piece of textured dot kraft cardstock as my base and love the way the cut file looks against it!  I used a fun wood veneer circle from Colorcast Designs as my title piece and layered it over the cut file.


I used some digital papers and elements from the Little Lamm Co. Gossamer collection, along with stamps from Feed Your Craft, and a wood/epoxy button sticker from Freckled Fawn.

I decided to cut out a few more of the leaves from the cut file to add to the page.  I like the way it helps the pages feel like one cohesive spread.


I did some stamping, typed my journaling on a label, and added a few staples using my Tim Holtz Tiny Attacher, one of my favorite scrapbooking tools.


Thank you for stopping by today!  I hope I have inspired you to use a cut file on your next project!  


Tuesday, September 18, 2018

Octobers


Hello friends!  I'm here today sharing a spread in my traveler's notebook.  I created this fun, Autumn-inspired layout for The Cut Shoppe using the World of Octobers cut file.


I sized the cut file to fit on my TN page and cut it out using a digital wood grain patterned paper from my stash.  I used some papers from an older Fancy Pants collection called Golden Days to cut out the word "Octobers" and the leaf image.  I then backed the cut file with another patterned paper from the same collection.

I stamped some Autumn phrases at the top and bottom of the page using some Kellie Stamps and an older Gossamer Blue stamp set .  I love the added interest stamping provides!


For the other half of my spread, I printed a full page photo.  I love the look of large photos in my TN!

I did some stamping on patterned paper, a stamped tag for my journaling, and added a sentiment die cut and a puffy heart sticker.  


Thank you for stopping by today to check out my latest project!  I hope you have been inspired to create something fun today!