Showing posts with label feed your craft. Show all posts

Monday, March 30, 2020

Love This | The Cut Shoppe

Hey friends!  I'm here today sharing a layout in my life crafted album.  For my final project for The Cut Shoppe, I chose to create a spread using one of my favorite cut files- the Love Rules cut file.

Here's a look at the layout and cut file:


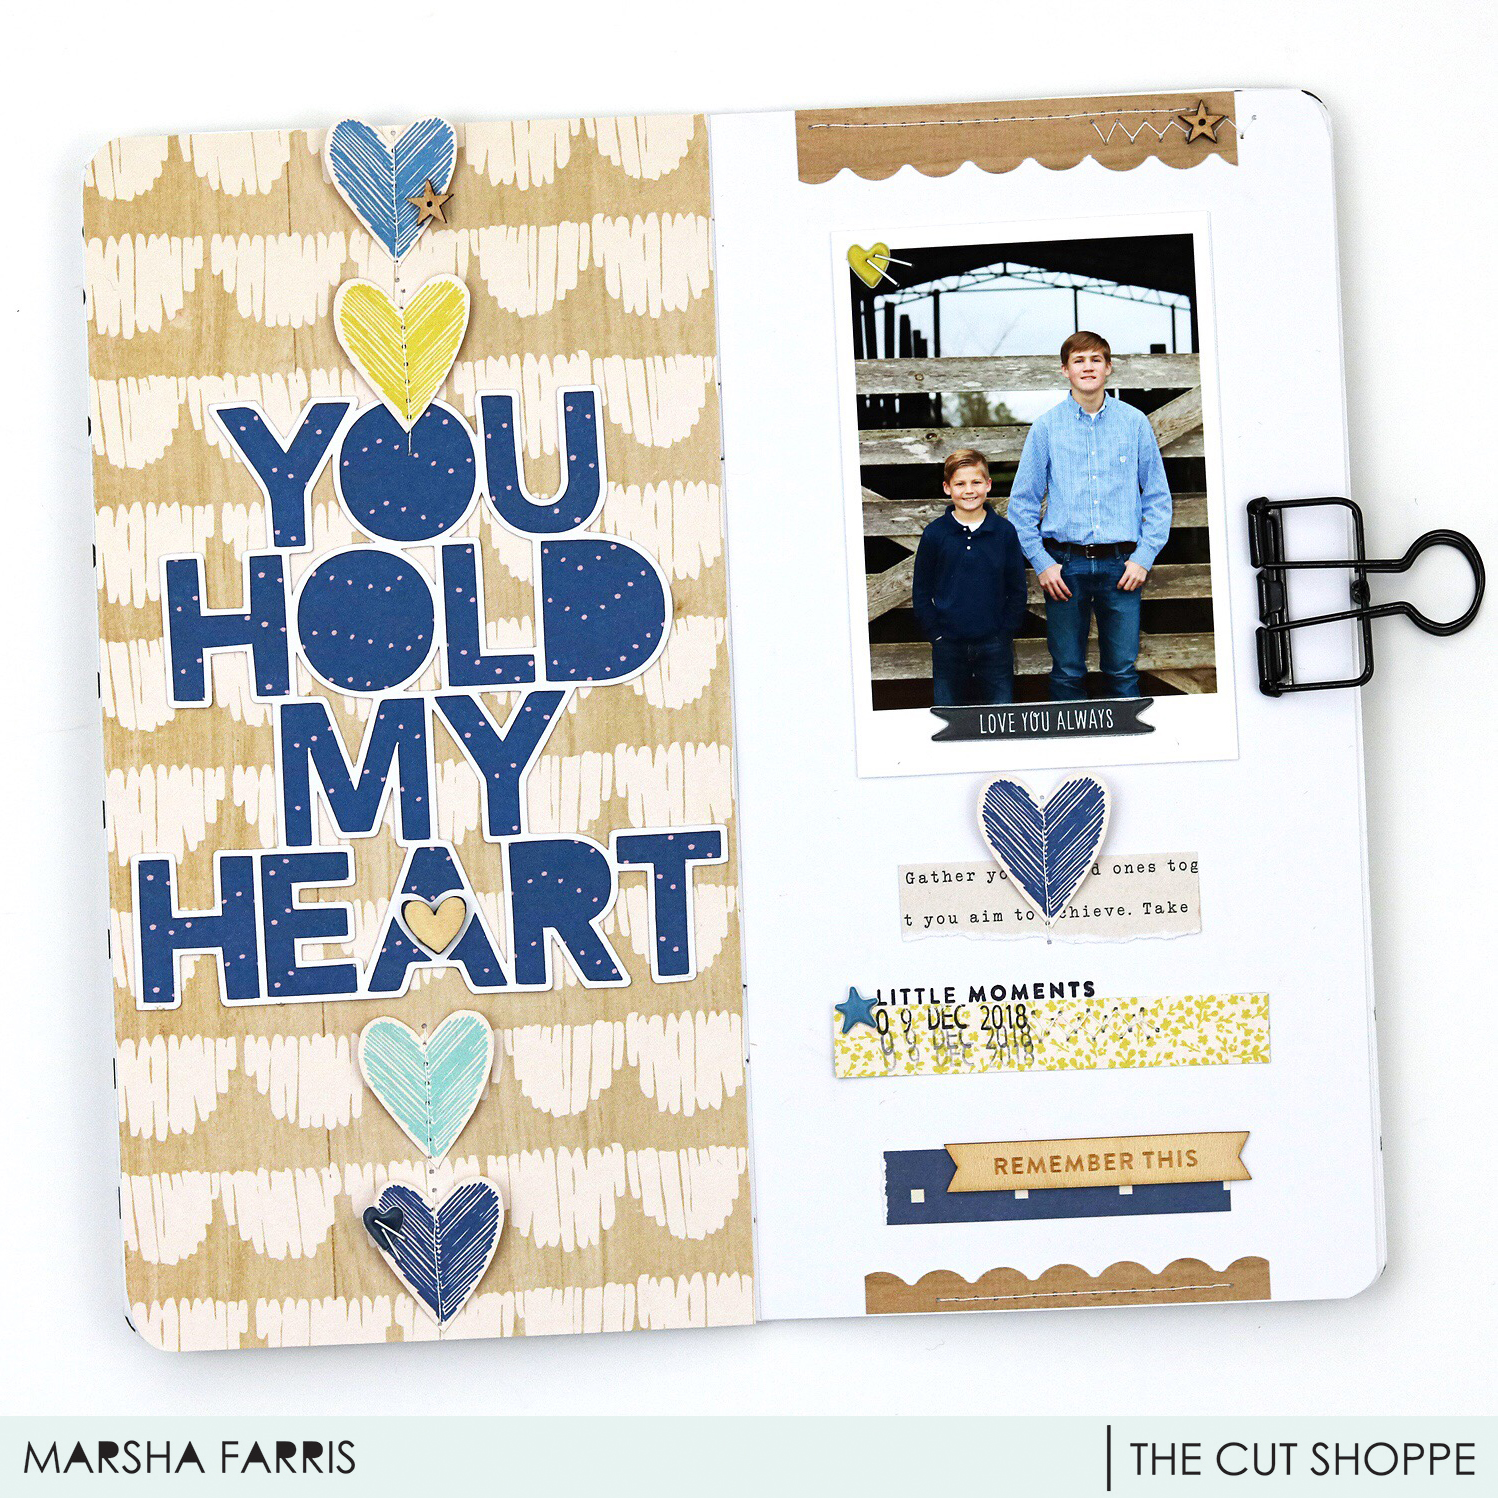
To begin the spread, I cut out the heart TN portion of the cut file using white cardstock.  I adhered it to a patterned paper sized to fit in the album.  Next, I did some machine stitching around the edges of the cut file.  I added my photo and used some wood veneer hearts as embellishment, adding them to the hearts that were cut out in the cut file.  I also added a rainbow sticker and wood veneer heart to frame the photo.


For the other side of the layout, I adhered a strip of the same patterned paper to the left side of the page and did more machine stitching around the edges.  I layered some tags and a label and created my title using a puffy word sticker and stamping.  To complete the page, I added my journaling in strips below the title and added a few more wood veneer hearts.


Thank you for stopping by today!  I have enjoyed my time here, sharing projects using the awesome cut files from The Cut Shoppe store!

xo,

Wednesday, February 6, 2019

You Hold My Heart | Traveler's Notebook Layout

Hey friends! I'm excited to be here today sharing my current FAVORITE layout in my traveler's notebook.  I used the Hold My Heart cut file that is available at The Cut Shoppe.
I love this photo of my sons taken last year on our farm, and thought it would work perfectly with the cut file.

For this layout, I used mainly the Maggie Holmes Willow Lane collection.  I cut out the cut file using white cardstock and backed it with a navy patterned paper. I chose a wood grain scallop paper from this collection to use as the background for the page. This is my favorite paper from the collection, so I was excited to get to use it on a layout!  I fussy cut some hearts from another paper and used my sewing machine to stitch them to the page, folding them down the center for added dimension.  I love how this turned out!

For the other page, I adhered my photo and added several strips of paper from the same collection. I did some additional machine stitching and added some stamping. To embellish the page, I added a few puffy stickers, staples and wood veneer pieces.
Thank you for stopping by today to take a look at my latest creation!  Happy crafting!

xo, Marsha

Saturday, October 13, 2018

Say Hello to Fall


Hello!   Today I am sharing a project I created for The Cut Shoppe- a layout in my traveler's notebook album using the new Falling for You Traveler's Notebook Decorative Page cut file that can be found at The Cut Shoppe.


I love fall layouts and recording all the fun things we do during this season.  I thought this cut file would be perfect for my TN spread documenting a photo of my son taken last year at our local fair. 


I started by cutting out the file using white cardstock.  I chose to use a piece of textured dot kraft cardstock as my base and love the way the cut file looks against it!  I used a fun wood veneer circle from Colorcast Designs as my title piece and layered it over the cut file.


I used some digital papers and elements from the Little Lamm Co. Gossamer collection, along with stamps from Feed Your Craft, and a wood/epoxy button sticker from Freckled Fawn.

I decided to cut out a few more of the leaves from the cut file to add to the page.  I like the way it helps the pages feel like one cohesive spread.


I did some stamping, typed my journaling on a label, and added a few staples using my Tim Holtz Tiny Attacher, one of my favorite scrapbooking tools.


Thank you for stopping by today!  I hope I have inspired you to use a cut file on your next project!  


Sunday, August 12, 2018

Down by the River

Hey scrappy friends!  I'm here with you sharing another layout in my ringed traveler's notebook. 


I decided to document one of my favorite places- a small strip of land where the river crosses our property.  When the water in the river is low enough, we have our own little "beach" complete with white sand. 


I decided to print a full page photo to highlight on my spread.  I just love the way the sun is peeking through the trees!  I added the title on the opposite page to some graph paper using the Jenkins alpha stamps from Kelly Purkey.  I LOVE this stamp set!  Because the photo & stamping were so striking, I chose to keep the layout fairly simple.  I added some puffy stickers, labels, and a little more stamping and called it done.


Sometimes simple is better!  Thanks for stopping by!

Thursday, August 9, 2018

Sweet Baby

Hello crafty friends!  I'm here again today sharing a layout in my traveler's notebook.


I just LOVE documenting my precious niece.  She is just too cute!  This photo was one of my favorites from her newborn photo session. 


I received a mini kit from The Wild Hare Kits and could not wait to use it.  It included a variety of Pinkfresh Studio die cuts, puffy stickers, chipboard, and a 6x6 paper pad.  I used some papers from the She Blooms collection by Illustrated Faith and a mini doily from Doodlebug Designs.

I love using chipboard on my layouts, but find it to be quite dimensional for my TN.  I peeled off a couple of layers of the chipboard and now it works perfectly- still dimensional but not too thick!


I layered some of the die cuts and puffy stickers, stamped the date, and added twine to the tag.  I used my tiny attacher to add a tab to the top of the spread. It's fun having things hang over the edge of the page!

For the title, I used my Silhouette Cameo to cut out the word "Sweet" using a handwriting font and white cardstock.  Pinkfresh Studio white alpha stickers finished off the title.


I had fun adding another layout to my traveler's notebook!  Thanks for stopping by again today!  

Saturday, August 4, 2018

Summer Fun

Hey everyone!  I'm back with another spread in my traveler's notebook using some fabulous summer digitals from Feed your Craft and In a Creative Bubble, along with some physical supplies.  This kit worked perfectly to document a recent trip with my youngest son to our local splash pad.


Using my Silhouette Studio software, I traced one of the digital stamps and then cut it out using my Silhouette Cameo.  I love using a large title as a feature on a traveler's notebook spread!


I used Photoshop to alter the wording on one of the pdf images and then printed the pdf  that was included in the kit.  I love creating hybrid layouts because the elements can be customized to any color scheme or style.


I then added stamping and layered some tags, stickers, and acrylic stars- all the little details that make this spread even more fun.

I hope you will try adding a large title to your next TN layout!  Thanks for stopping by!


Thursday, July 26, 2018

Summer Sun & Fun


Hello everyone!  You've got to start somewhere, right!?!  This is my first layout share in my little corner of the web.  I created a summer spread in my ringed traveler's notebook using the FREE Summer Sizzle printable from The Cut Shoppe- available in The Cut Shop Scrap Spot Facebook Group.


I used my Silhouette Cameo to print and cut the images- printing several extras of the flamingo because he is just too cute!  I also used the Beach Bum cut file from The Cut Shoppe to cut the leaves, using both the positive and negative of the cuts and different patterned papers.  This gave the leaves more texture and dimension.


My journaling is on a tag that I tucked behind the photo.  I also did some stamping using a Feed Your Craft stamp set called Pattern Play.  This is one of my most used stamp sets because it can be used on any type or theme of layout.


Thanks for stopping by today and I hope to see you again soon!  I have so many fun projects planned that I am excited to share with you!

Marsha